Locket Planter Box From Kreg Tools


A hinged "locket" planter you can personalize with photos
Three simple wood boxes with a twist makes this planter a personalized gift for your mom! Connecting the boxes with hinges creates multiple display options, including revealing hidden "locket" pictures. Even better, create this fun planter with your mom!
Materials and Tools Needed
Before you get started, gather your materials and tools to make the process smooth and efficient.
Materials:
| Material | Quantity |
|---|---|
| Plywood, 3/4" Thick, 2x4 Feet | 1 Sheet |
| Sandpaper | 1 Pack |
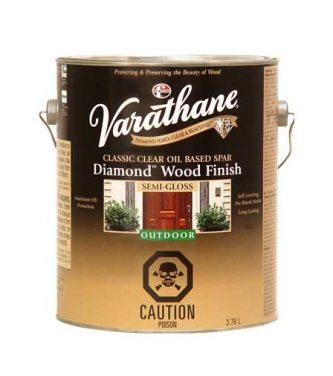
| Stain | 1 Can |
| Chrome Cabinet Handles | 2 Handles |
| Chrome Hinges | 2 Hinges |
| Small hinges and screws | As needed |
| Wood glue, clamps | As needed |
| Photos sealed or laminated | For locket |
Tools:
- Kreg Tools Mobile Project Center
- Wood Project Clamp - 3"
- Cabinet Hardware Jig
- Rip-Cut™
- Circular Saw (cordless)
- Square
- Tape Measure
- Drill (cordless)
- Nail Gun
- Sander
Cut Plans:
Box Bottoms: 4.5" x 4.5" (3 pieces)
Box Sides: 4.5" Tall x 5.25" Wide (12 pieces)
Step-by-Step Build Instructions
-
Step 1: Gather Materials & Mark Cut Lines
Mark cut lines on the plywood using the cut list as your guide.
-
Step 2: Cut Plywood
Using a circular saw and Kreg rip-cut, cut the plywood. Spend extra time making sure everything is lined up and even. The Kreg rip-cut helps make very straight cuts.
-
Step 3: Sand Edges & Dry Fit
Sand all edges and dry fit pieces into place making adjustments if needed.
-
Step 4: Mark Picture and Handle Locations
If adding personalized pictures, mark those four squares as they won't be getting stain. Also mark the edges that will get a handle.
-
Step 5: Stain or Paint
Stain all pieces except the ones that will have the transferred pictures. Let dry completely.
-
Step 6: Apply Pictures
If adding pictures, apply to wood now. Make sure photos are sealed or laminated for protection.
-
Step 7: Attach Handles
Use the Kreg cabinet hardware jig to add the handles before assembling boxes.
-
Step 8: Assemble Boxes
Dry fit your box pieces again and hold or clamp pieces into place. Add glue, then use nails to secure all sides.
-
Step 9: Add Hinges
Mark the placement of the hinges. Place one hinge on front and another on opposite side back. Drill pilot holes, screw into place.
-
Step 10: Add Plants or Herbs
Fill with your favorite potted flowers or herbs. Get creative and customize to your mom's favorites!
Final Thoughts
This locket planter box is more than just a planter; it's a personalized gift that tells a story. The hidden photo compartments add a sentimental touch that makes this project perfect for Mother's Day, birthdays, or any special occasion. By building it together, you create not just a beautiful planter but lasting memories too.
FAQs
How big should each box be?
Keep boxes proportional to your plant pots. Many builders size the two side boxes slightly smaller than the center so the "locket" effect reads clearly when opened.
What hinges work best?
Small butt or piano hinges work well. Choose non-rusting finishes and pre-drill to avoid splitting.
How do I protect the photos?
Seal prints with a clear film or laminate. You can also mount photos behind thin acrylic to keep moisture away.
Indoor or outdoor use?
Either. For outdoor use, pick durable species and apply an exterior-rated finish, refreshing as needed.